------------------------------------------------------------------------------
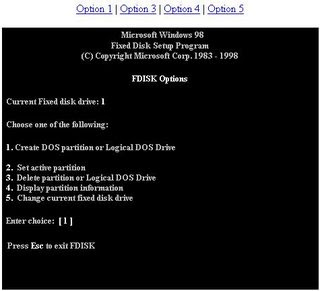
Using the options within this screen you will be able to create the various different partitions. These options will only allow you to create FAT16, and FAT32 partitions if supported and you pressed Y for Yes to enable large disk partitions. If you are attempting to create NTFS partitions, use Windows NT Disk Manager.
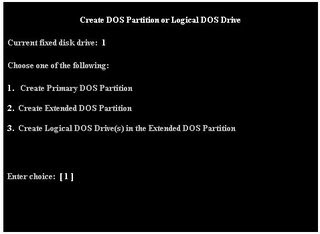 1. Create Primary DOS Partition - Choosing this option you will be prompted to use maximum space. If you specify yes, this will use up to 2 GB if creating FAT16 partitions, or up to 32 GB if using FAT32. If you choose no you will be able to specify how large you would like the partition to be. NOTE: you will need to create primary partitions before being able to create Extended or Logical DOS partitions.2. Create Extended DOS Partition - If you are using FAT16 and have a 2 GB or higher hard drive or have only specified a small portion of the hard drive as the Primary partition, use this option to create the Extended DOS partition(s) (other drive assignments). The Extended DOS partition will be used to hold the Logical DOS drives; therefore, use the maximum space left on the hard drive.3. Create Logical DOS Drive(s) in the Extended DOS Partition - This option is used after you have created an Extended DOS partitions. Once the Extended DOS partition has been created you then can specify the sizes of other partitions you wish to create.Example of what has been explained above:Bob has a six GB hard disk drive and wishes to divide the hard drive into three partitions, each using FAT 16.Step 1. If prompted to use Large Disk support, press N for no because Bob does not want FAT32, he would like FAT16.Step 2. Choose option one to create a Primary partition. Once prompted to use maximum space, press N for no and specify 2 GB as the size of the primary partitions Step 3. Once the primary DOS partition has been created, choose option two to create an extended DOS partition. Use the maximum space, which would be four GB because two GB has already been used for the Primary Partition.Step 4. Create two logical DOS drives, each being 2 GB.Step 5. Reboot the computer and format each of the drives to allow them to be accessible.Assuming Bob only had one hard drive, doing the above Bob would have:Drive C: Partition 1 (Primary) FAT 16Drive D: Partition 2 (Extended/Logical) FAT16Drive E: Partition 3 (Extended/Logical) FAT16Note: Once a primary partition has been created please ensure that you set the partition as an active partition.
------------------------------------------------------------------------------
Within this screen you will have the capability of deleting pre-existing DOS partitions. If you currently have no disk space available on your hard drive and wish to create additional partitions, you must first use this screen to delete the partitions and then you will be able to create partitions. NOTE: if you delete partitions, any information on those partitions will be erased and CANNOT be recovered.
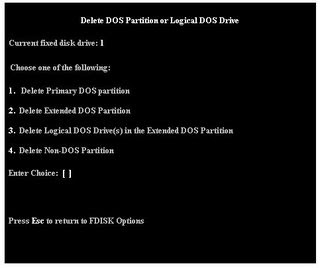
1. Delete Primary DOS partition - Use this option to delete your main primary partition. However, if you currently have any Extended / Logical DOS partitions, you must delete these partitions before you will be able to delete the Primary DOS partition.2. Delete Extended DOS partition - If you have your computer partitions into more than one drive, use this option to delete the extended dos partition(s). You must delete the Logical DOS Drive(s) before you can delete the Extended DOS partition.3. Delete Logical DOS Drive(s) in the Extended DOS Partition - This option would be used first if you have extended DOS partitions and wish to delete the extended partitions.4. Delete Non-DOS Partition - This option is usually used for partitions that either have been created by third-party applications, such as a DDO or other operating systems such as IBM Warp, Unix, as well as various other operating systems.Example of what has been explained above:Bob has created three partitions on one hard disk drive; however, he would like to delete them all.Step 1. Delete the two logical DOS drive(s) in the Extended DOS partition with Option number three.Step 2. Once the Logical DOS partitions have been deleted, choose option number two to delete the extended DOS partition.Step 3. Choose option one to delete the Primary partition.Step 4. Reboot the computer to allow above changes to take effect.
------------------------------------------------------------------------------
Within this screen you will be able to see what is currently being used and how your computer hard drive is setup. NOTE: If you see invalid information such as !, *, &, % as the Volume Label, the Partition, or the Status, it is a good possibility that you may have a VIRUS on the computer.
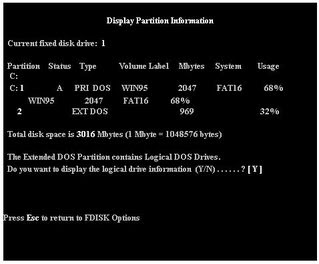 The above picture displays information about Extended DOS partitions; if, however, you only have a Primary DOS partition, your screen would only display the partition information and you will only have the option to Esc out of the screen.
------------------------------------------------------------------------------
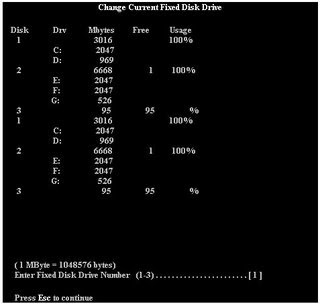
This option is only available if more than one Hard Drive is installed within the computer. In the below picture you can notice that we have 3 hard drives listed within this computer. Disk 1 has two partitions, which are C: and D: The hard drive's total space is 3 GB. Then Disk 2 has three partitions E:, F:, and G: and the hard drive total space is 6668, or 7 GB. As you notice in the below picture, there is also a Disk 3, this is actually an Iomega Zip Drive hooked up to the IDE controller on the Motherboard. Other media that is connected to the IDE controller within your computer will usually be displayed within FDISK; however, this is not a hard drive and does not need to be FDISKed, this is why 95MB is free. An exception to this rule would be a CD-ROM.
